Tagbar, elm and rmarkdown
TL;DR
Get ctags for Rmarkdown and Elm by installing Tagbar and downloading elmtags.py and rmdtags.py.
Exhuberant ctags is a formidable way to navigate through your projects. It supports 41 different programming languages, allowing you to jump to definitions of variables, functions, classes, etc. It is also designed from the ground up to be used with vim, although it can be used with other editors I’m sure. Unfortunately, few of my languages of predisposition appear in the list of supported languages, so I’d never really used ctags.
Although it is not a programming language, I started using tags for vimwiki navigation, the only alternative being the :TOC function from vim-pandoc, which doesn’t work for the vimwiki syntax (even if you can use markdown syntax in vimwiki, at the loss of folding though…).
What brought me to navigation in vimwiki using ctags is Tagbar, for which the vimwiki devs have created a custom tag-generating script !
Tagbar, as the name implies, displays a bar on the right with the tags, allowing you to see all definitions at a glance and navigate between them quickly. It supports scopes to create hierarchies and display detailed information for tags.
Tagbar also provides a tag generator for R in its wiki.
However, this method of generation using regexes in ~/.ctags is very limited and can’t generate scopes.
Inspired by the custom script for vimwiki files, I decided to code my own custom tag-generating scripts for my primary language, R.
Rmarkdown
Because my workflow now includes mainly Rmarkdown files, not only for the creation of reports/webpages, but also for the benefits of literal programming and organizing the code in units of computation within chunks, I decided to create a generator not only for R files, but for Rmarkdown files. The generator is available as a gist.
The generator creates tags for:
- Rmarkdown headers as a hierarchy, with optional CSS classes as the signature
- code chunks inside their respective header, with options as the signature
- functions defined in the document
- variables declared in the document
You can enable it by adding this to your .vimrc
let g:tagbar_type_rmd = {
          \   'ctagstype':'rmd'
          \ , 'kinds':['h:header', 'c:chunk', 'f:function', 'v:variable']
          \ , 'sro':'&&&'
          \ , 'kind2scope':{'h':'header', 'c':'chunk'}
          \ , 'sort':0
          \ , 'ctagsbin':'/path/to/rmdtags.py'
          \ , 'ctagsargs': ''
          \ }
I added variable declarations for the sake of it, but I personally don’t like to see them so I just removed the 'v:variable' key from 'kinds'.
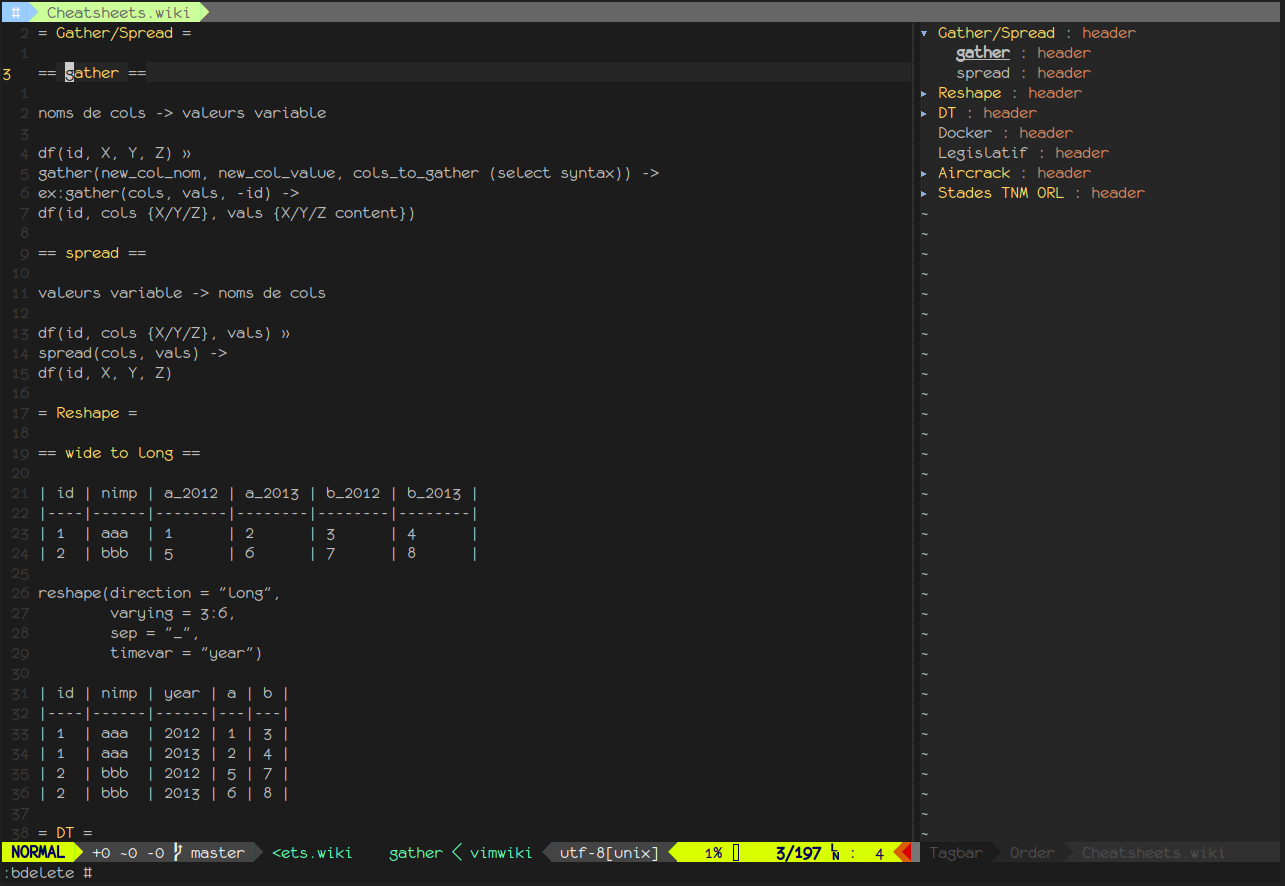
Here is what it looks like:
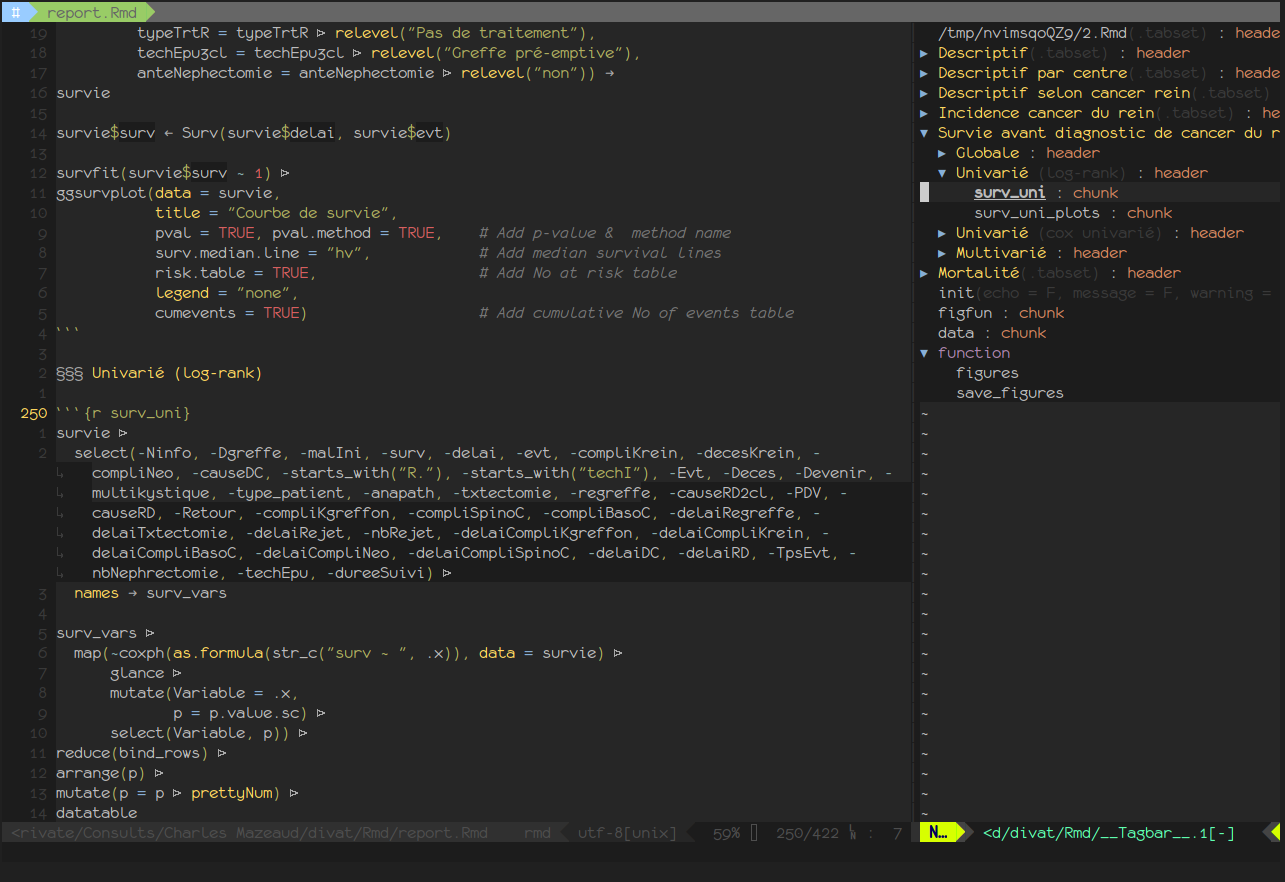
It’s now easy to navigate around the outline of the document, down to individual chunks.
Not content with doing this for Rmd files, I decided to do the same for Elm files.
Elm
Following the Elm Style Guide, or even better using elm-format in conjunction with elm-vim guarantees a consistent style, which makes Elm a pretty easy target for generating tags.
As of Elm version 0.19, and consistent with the life of a file philosophy of growing source files and keeping code concentrated in fewer of them, elm-format adds top-level comments for sections of code: Imports, Data and Functions. This prompted me to use top-level comments as section headers, and create tags for:
- imports, with their eventual alias, and detail of exposed functions and types
- types
- functions, with their signature
This is also available as a gist, and looks like this:
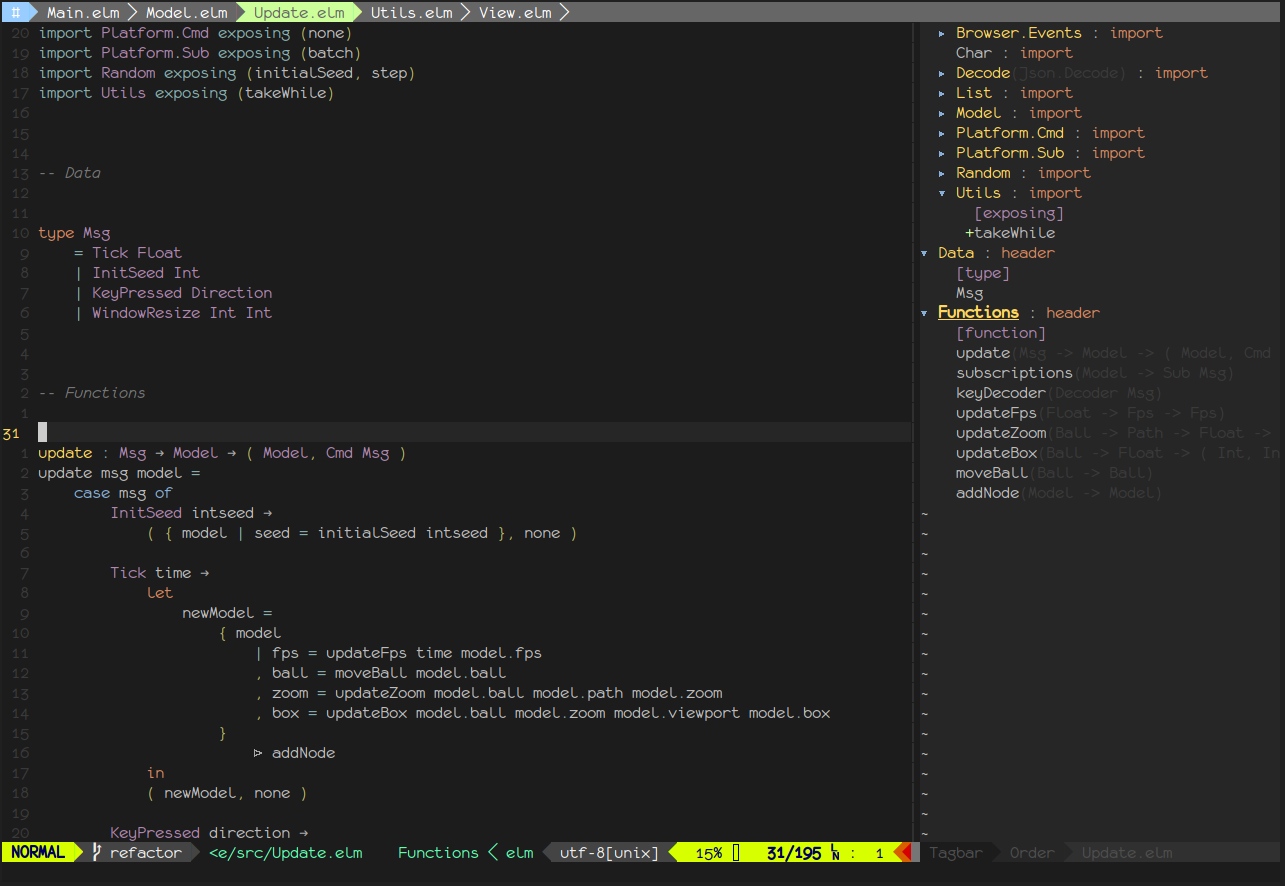
To enable it, add this to your .vimrc:
let g:tagbar_type_elm = {
          \   'ctagstype':'elm'
          \ , 'kinds':['h:header', 'i:import', 't:type', 'f:function', 'e:exposing']
          \ , 'sro':'&&&'
          \ , 'kind2scope':{ 'h':'header', 'i':'import'}
          \ , 'sort':0
          \ , 'ctagsbin':'/path/to/elmtags.py'
          \ , 'ctagsargs': ''
          \ }